My Easy Nail Clipping Guide for Dogs – Stress-Free & Paw-sitive!
If you’re like most people, the idea of clipping your dog’s nails can seem a little intimidating. The wiggling paws, the nervous energy, and that tiny “click” sound when you get too close? Yep, I’ve been there. But fear not! I’m here to walk you through my personal nail clipping guide for dogs — a cheerful, easy-to-follow process that will keep tails wagging and paws healthy. If you have any questions or need advice, contact us here.
Why Nail Clipping Matters for Dogs
Before we dive in, let me explain why dog nail clipping is so important:
- Prevents nails from cracking, splitting, or curling under
- Avoids posture and joint issues caused by long nails
- Reduces the chance of painful snags on carpet or furniture
- Protects you (and your floors) from accidental scratches
Healthy nails = a happy, healthy puppy!
My Step by Step Nail Clipping Guide for Dogs
Ready to get started? Here’s how I clip my dog’s nails without the stress.
1. Gather Your Nail Clipping Tools
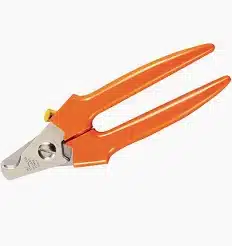
Nail Clippers
Make sure you have everything ready before calling your puppy over:
- Dog nail clippers (I prefer the scissor-style for better control)
- Styptic powder (just in case)
- Treats (lots of them!)
- A file or Dremel tool for smoothing edges (optional)
2. Choose a Calm Time and Spot For Nail Clipping
- I like clipping nails when my dog is relaxed, like after a walk or play session.
- Find a quiet, non-slip surface. You can use a grooming mat or a towel on the floor.
3. Get Comfortable with the Paws
- Take a minute to gently massage your dog’s paws.
- Touch their toes and nails so they feel safe and loved.
- Treats or a lick mat can help to keep things positive!
4. Look for the Quick (and Avoid It!)
- The “quick” is the pink area in the nail that contains nerves and blood vessels.
- In light nails, it’s easy to see. In dark nails, trim small amounts and look for a gray or white center.
- Don’t clip too close! Better to go slow and safe.
5. Start Nail Clipping
- Hold the paw gently but firmly.
- Clip at a slight angle following the natural curve of the nail.
- If your dog gets nervous, take a break, give a treat, and try again.
6. Smooth the Edges (Optional)
- I sometimes use a nail file or Dremel to gently smooth rough edges.
- This step helps prevent scratches and keeps the nails looking tidy.
7. Reward, Praise, and Repeat!
- After each paw, give your pup lots of praise, a treat, and some love.
- Keep sessions short and sweet. If needed, do one paw a day to keep it stress-free.
Bonus Nail Clipping Tips for a Paw-sitive Experience
- Stay calm: Your energy affects your dog. If you’re relaxed, they will be too.
- Don’t force it: If your dog is anxious, stop and try later.
- Practice often: Even just touching paws daily helps desensitize them. I massage their feet while snuggling and watching T.V. with them in the evenings.
How Often Should I Clip My Dog’s Nails?
I aim to trim my dog’s nails every 6–8 weeks, depending on how fast they grow and how much natural wear they get from walking on pavement. Some dogs may need their nails trimmed as much as every 2 weeks.
A good rule: If you hear clicking on the floor, it’s time for a trim!
Additional Resources
Final Thoughts: Nail Clipping Can Be Fun (Really!)
With a little patience and a lot of love, nail clipping for dogs becomes a routine you both get used to. It can become a part of your pampering routine that helps to bond you and your dog.
Grab your clippers, a handful of treats, and give it a go. Your dog’s happy paws will thank you.